
The Deep Sea Hat is a pretty crochet hat worked sideways in rows, featuring a folded up ribbed brim and a pretty textured pattern reminding of herringbone.

*Disclaimer: This post includes affiliate links and at no additional cost to you, I might earn a small commission if you decide to purchase through these links. Thank you!
Deep Sea Hat
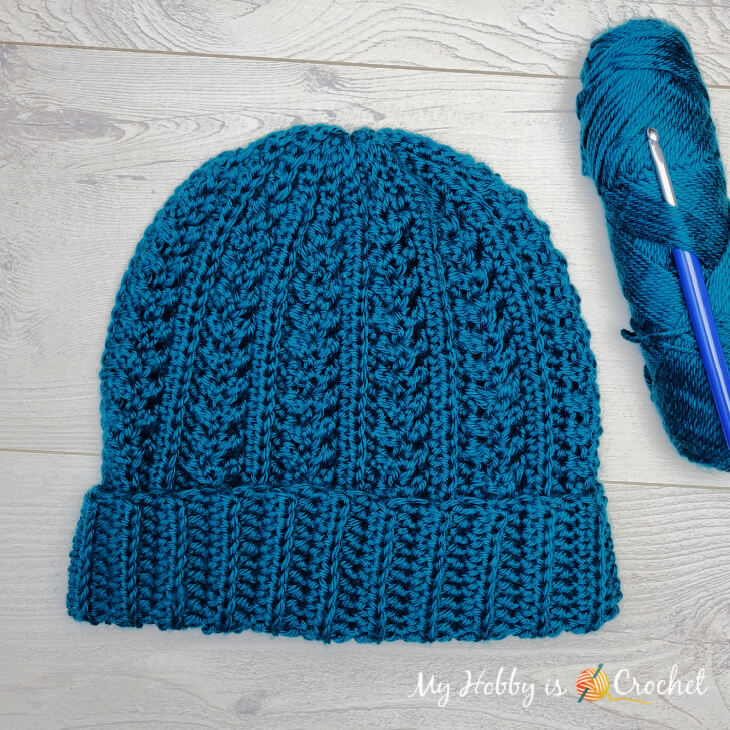
The hat will be crocheted in rows from side to side, with the brim, the body of the hat and the top crown part made all in one piece.
There are no increases or decreases, the top of the hat will be shaped with the help of shorter stitches.
The pattern is quite easy to crochet, once you get familiar with the special stitches used. You will only need to repeat 4 rows until you get the width you need for the hat circumference.
Update 12.Oct 2024: At the end of the written pattern I have included a Video Tutorial for the visual crocheters!
SIZE
The hat is sized to fit teen/ adult women.Hat total height with unfolded brim: 11.5 inches (29 cm)
Hat circumferince without stretching 18 inches (45 cm); the hat is stretchy!

The height of the hat will be determined by the length of the foundation chain and the hat circumference will be given by the number of rows.
For a longer/shorter hat, start with more/less foundation chains.
For a wider/ narrower hat add more/less rows in the pattern repeat of 4 rows.
Here's a back view of the hat! If you like, you can add a pom pom! I like the hat the way it is, without pom pom.

GAUGE
16 hdc back loops only and 10 rows = 10 cm x 10 cm (4” x 4")
SUPPLIES:
- 1 skein of aran, medium weight yarn.
I have used Caron Simply Soft yarn , in Pagoda colorway;
skein weight: 170g (o.75 pounds), yardage/skein: 315 yards (288 meters)
Total yarn used for the hat: about 200 yards
- 5 mm/ H Crochet Hook
- Scissors
- optional stitch marker
STITCHES AND ABBREVIATIONS (US TERMS)
- ch: chain- back bump of chains: Click here for my picture tutorial.
- st: stitch
- sc: single crochet
- sc blo: single crochet worked in back loops only
- hdc: half double crochet
- hdc blo: half double crochet worked in back loops only
- dc: double crochet
- blo: back loop only
- RS: right side of work
- WS: wrong side of work
Special Stitches:
- BcrDC: Back Crossed Double Crochet : sk 1 st, work 1 dc into the next st, 1 dc back into skipped st going behind the last dc just made, so as not to catch it.
- FcrDC: Front Crossed Double Crochet: sk 1 st, work 1 dc into the next st, 1 dc back into skipped st going in front of the last dc just made so as not to catch it, inserting the hook from back of the work to the front.
- BcrHDC: Back Crossed Half Double Crochet : sk 1 st, work 1 hdc into the next st, 1 hdc back into skipped st going behind the last hdc just made, so as not to catch it.
- FcrHDC: Front Crossed Half Double Crochet: sk 1 st, work 1 hdc into the next st, 1 hdc back into skipped st going in front of the last hdc just made so as not to catch it, inserting the hook from back of the work to the front.
NOTES
- the ch1 at beginning of the rows will not count as a st
- Do not work the slip stitches at the beginning/ end of the rows tight; otherwise it will be difficult the next row to insert the hook into them; or you might even unsee them! Work the slsts taller!
- If you like, you can use a stitch marker to mark the start of the brim stitches.
HAT INSTRUCTIONS
Using hook size 5mm and leaving a long tail (about 16 inches) that will be later used to sew the short ends together,
Ch 47.
Turn the foundation chains to work the 1st.row into the back bumps behind the chains.
Row 1 (WS): work 1 slst into 2nd. ch from hook and 1 slst in next ch, 1 sc in each of next 3 ch, 1 hdc in each of next 41 ch; ch1, turn (46 sts total)
Row 2 (RS): 41 hdc blo, 3 sc blo, 2 slst blo; ch1, turn (46 sts total)
Row 3 (WS): 2 slst blo, 3 sc blo, 1 hdc blo, 1 BcrHDC, 9 BcrDC, 19 hdc blo; 1 hdc inserting the hook under both top loops; ch1, turn. (46 sts total)
Notes:
- working the last hdc st into both top loops will give the edge more stability.
- The first 6 sts at the beginning of the uneven rows will form the top part of the hat.
- The part with the crossed stitches will be the body of the hat and the rest worked with the hdc into back loops will form the ribbed brim!
Row 4 (RS): 20 hdc blo; 9 FcrDC, 1 FcrHDC, 1 hdc blo, 3 sc blo, 2 slst blo; ch1, turn (46 sts total)
Row 5 (WS): 2 slst blo, 3 sc blo, work 40 hdc blo, 1 hdc inserting the hook under both top loops; ch1, turn (46 sts total)
Row 6 (RS): 41 hdc blo, 3 sc blo, 2 slst blo; ch1, turn (46 sts total)
Now you can measure your piece and make a gauge test. My piece is 13 inches long right now! After more rows it will shrink about 1 inch due to the shorter stitches at the top!
Rows 7- 44: repeat from Row 3 to Row 6 ; the last 2 rows should be with the crossed stitches as Row 3 and Row 4.
(46 sts total)
You will have 11 braiding rows formed by 2 rows of crossed sts.
After finishing the last row, the piese should look like this:

Cut yarn leaving a long tail that will be used to close the hole on top of the hat. Finish off.
Joining the sides into a tube:
Fold over the short ends of the piece so that the right sides are facing each oder. Sew the back seam on the wrong side ! Thread a yarn needle with the long yarn tail you left at the beginning of work; sew the short edges together inserting the needle through the back loop of the stitches on one edge and the front loop of the corresponding stitches on the other edge, back and forth, until you reach the top edge.
Closing the hole on top of the hat
Thread a yarn needle with the second yarn tail, weave yarn in and out into slip stitches at top of hat. Cinch together to close space and fasten off securely, making several knots. Weave in all ends.I hope you enjoy this pattern!
Watch my VIDEO TUTORIAL below to learn how to crochet the Deep Sea Hat!
If you can't see the video right above, you can Watch this Video on YouTube!
Here's a pin for your Pinterest Crochet Boards!

Don't miss out new free crochet patterns, tutorials and other updates from My Hobby is Crochet! Subscribe to our FREE Newsletter and follow My Hobby is Crochet on Facebook, Pinterest, Instagram and YouTube.
Deep Sea Hat
Written Instructions, Video and Pictures, Copyright © Oct 2024 Kinga Erdem
This pattern is free for your personal use, you can sell the products of your work, a link back to my blog would be appreciated.
Do not use my photos for selling purposes or modify them in any way.
Please don't repost the pattern itself to any other sites, but please share the link to the pattern if you want to share the pattern with your friends.
You may not give away copies of this pattern.
Do not make video tutorials or translate my pattern in other languages without my written consent!
Thank you.
Kinga

This hat is beautiful. When joining the sides into a tube, do I go from inside the hat to the outside or the outside to the inside, or doesn't it matter? Seaming always stumps me. I think it's the hardest part of making a hat. Hope to start this one soon. Thank you for the lovely pattern.
ReplyDelete